Dummy filler
Generate the dummy filler script
You will need to generate the dummy filler utility file by combining two existing files:
- Dummy metal (DM):
~/65NM_PDK_ZIP/65 MS RF GP/Utility/Mentor Graphics/tn65cldr001c3_2_5a/../Dummy_Metal_Calibre_65nm.25a
- Dummy oxide definition / poly (DODPO):
~/65NM_PDK_ZIP/65 MS RF GP/Utility/Mentor Graphics/tn65cldr001c2_2_5a/../Dummy_OD_PO_Calibre_65nm.25a
Copy these files into ~/ER_ASIC_Rev1/APR for ease of use. In the terminal, run the following command (which can also be found inside the DODPO file) to combine the two files:
cat Dummy_OD_PO_Calibre_65nm.24a Dummy_Metal_Calibre_65nm.24a > Dummy_OD_PO_Metal_Calibre_65nm.24a
In the resulting file, check that #DEFINE WithSealring and #DEFINE COMBINE_DODPO_DM are uncommented.
Run the dummy filler script on ASIC_Tapeout
In the ASIC_Tapeout layout, navigate to Calibre → Run nmDRC. For the "Runset File Path," create a directory called "DRC" and select it, and choose a runset name (e.g., Dummy_Runset). The following image shows the DRC dialog:
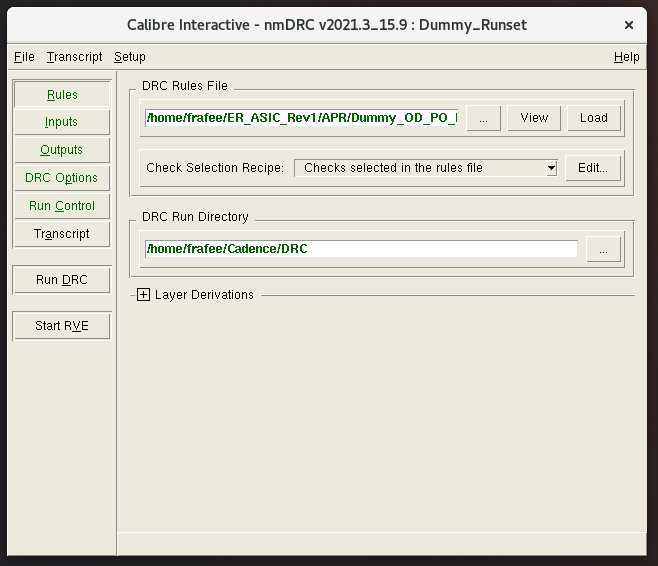
Note that the "DRC Options" tab may not automatically appear. You can open it by navigating to Setup → DRC Options. Make the following changes in the dialog:
- Rules
- DRC Rules File:
~/ER_ASIC_Rev1/APR/Dummy_OD_PO_Metal_Calibre_65nm.25a - LVS Run Directory:
~/Cadence/DRC
- DRC Rules File:
- Outputs
- Format: GDSII
- Cell suffix: _DODPO_DM
- DRC Options → Output
- Max. errors generated per check: All
- Max. vertices in output polygons: All
After these modifications, save the runset and select "Run DRC." Once DRC completes, a window will open with the results, and a GDSII file for the dummy filler has been generated.
From the main Virtuoso window, stream in the file ~/Cadence/DRC/ASIC_Tapeout.drc.results. You must ensure that the dummy filler has the correct coordinates with respect to the ASIC_Tapeout cell. Otherwise, you will encounter a DRC error (DM9.R.1). One way to do this is by opening the ASIC_Tapeout_DODPO_DM cell, navigating to Create → Shape → Rectangle, and creating a rectangle on the drawing "ref" layer from (0, 0) around the dummy filler.
In the ASIC_Tapeout layout, add in the dummy filler by selecting ASIC_Tapeout_DODPO_DM for the cell and line up the cell at exactly (0, 0) to match with the seal ring.
Final result (dummy filler)
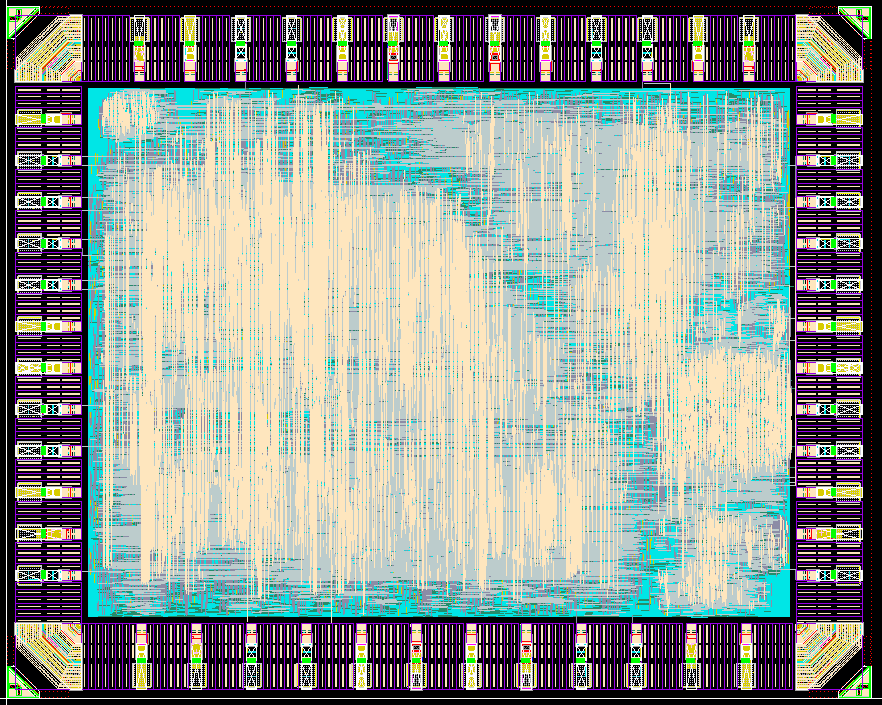
The following image shows the final result of the dummy filler for the ERASICv1:
The resolution of the display is turned to "Very High" for aesthetic purposes.
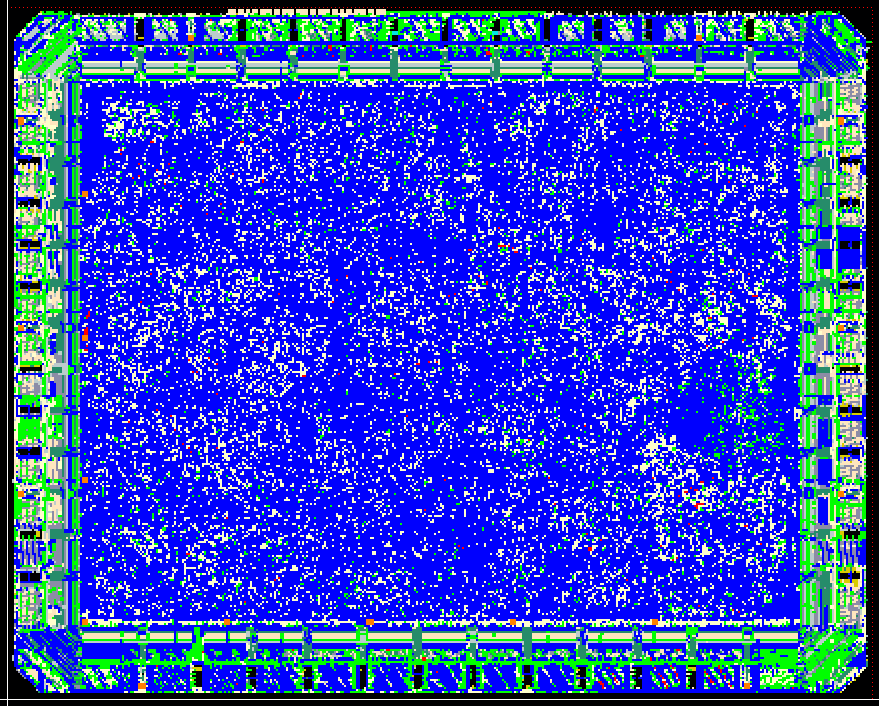
Final result (ASIC_Tapeout)
The following image shows the final result of ASIC_Tapeout for the ERASICv1, which includes ASIC_ALL (which includes DigitalCorePads, the bond pads, and the bond pad labels), the seal ring, and the dummy filler: